
Envious of those successful online bloggers and you want to be just like them? If they can do it, why can’t you right?
But, how do you get started? There’s so many available resources online which most of them says different. Information overload? Nah, it’s Confusion overload with the capital C.
You want to quit now? How about I’ll share with you my own experience when I started blogging? Do I have your attention now? *wink
Before we start, I would like to first talk about what a blog is, in case you’re not sure if what you are up to.
“(n.) Short for Web log, a blog is a Web page that serves as a publicly accessible personal journal for an individual. Typically updated daily, blogs often reflect the personality of the author.”
If you search online about its meaning, you’ll be flooded with about 800 million answers (and still counting) to that specific question via Google. But one blog post about its meaning really caught my attention because the author presents the answer in different ways, and I have to say that I agree to the last answer:
“Blogs are whatever they want to be. Blogs are whatever we make them.”
I’m sure you’ll come up with your own definition about blog when you finally start blogging.
So why should you create a blog and join the rapidly growing blogging community?
Before we dive deep into getting started with your own personal blog, I really want to share with you first WHY you should create a blog.
1. Blogging became one of the most popular ways of communication and spreading information and news across the globe through the internet.
2. It’s a great way to express yourself and to share information to others.
3. You’ll become a better person and it enhances your writing skills.
4. And lastly, you can make money out of it!
I’m sure you know some or maybe all of them, but it’s great to be reminded.
The Steps covered for this blogging guide
There are roughly four steps you need to go through in order to set up your very own blog. If you follow these steps, you can finally say hi to the blogging world! It’s not really that difficult to set up your own blog (only a little “technical” skills will be required). Actually, for this guide, you won’t be expecting any complicated codes to be implemented by you. Hurray!
4 steps on how to set up your own blog
1. Choose your preferred blogging platform
2. Choose a web hosting for your blog
3. Setting up your blog in your own custom domain
4. Design your blog
So, that’s it. Let’s start with step 1, shall we?
Step 1 – Choosing your preferred blogging platform
What is a blogging platform? To make it short, a blogging platform is the software or service you use to publish your content onto the internet in the form of a blog.
I have to say that it is the most crucial step in creating your own blog. Why’s that? It’s because, if you choose the wrong platform and it doesn’t suit your needs, then, just like me, you’ll end up going back to the beginning.
When I first started blogging, it wasn’t really that serious. I just want to share my favorite books and some exciting news about books to everyone. That’s why, I just blindly choose what platform to use. That time, there’s only two blogging platforms that really stood up to me, that was Blogger and WordPress.
I don’t really want to be biased but to those who really want to be serious in blogging, I would really recommend WordPress, they’re massive!
It’s by far the most used blogging platform online with over 84 million active users worldwide! Isn’t that just amazing?
Here are my reasons why I chose or should I say, migrated to WordPress and why you should too:
1. Super easy to set up and is free to use.
2. Tons of FREE themes and layouts available online.
3. There’s massive resources and support forums in case you get stuck.
4. Have useful plugins (which most of them are free) you could utilize to make your blog function better.
5. Easy customization.
I’m sure there’s tons of reasons out there why using WordPress could be a great choice, but I think it’ll be more convincing if I share to you what this guy from Google is using for his blog. Hint: It’s not Blogger.
I guess that’ll be it. Let’s proceed to Step 2 eh?
Step 2 – Self-hosting or free hosting?
If you’re like me, free hosting sounds more appealing than the first one right? But be careful there, because just like the first step, choosing between self-hosting to a free one is a crucial decision you’ve got to make.
Wordpres.com, Blogger, Tumblr, and many others offer free blogs for everyone. It’s perfect for those who aren’t serious with blogging, but beware, ‘coz they have their own downside:
1. You can’t have your OWN domain name
Free blog sites have their name included in your blog URL, which can be tough to verbalize if you’re trying to tell someone the URL of your blog. Example:
yourblog.blogspot.com
yourblog.wordpress.com
yourblog.tumblr.com
Not that nice right?
2. Limitations
You can’t absolutely have everything especially if it’s free. With free blogs, you can’t fully monetize it plus the memory of your blog is limited. Meaning to say, you can’t upload all those videos and images you want to show everyone. And worse, the free templates offered can be limiting.
3. You don’t OWN your blog.
Funny but it really is! You don’t actually own your blog. It’s hosted on someone else’s web property and they can delete it if they want to. One example is in blogger, if Google receives complaints about your blog or they detect spam contents in your blog, they have the prerogative to wipe your entire blog. Harsh isn’t it?
And lastly,
4. Negative impact to your search engine optimization (SEO) strategy
You might not be that familiar with SEO, but it’s one vital ingredient in your blog. Without proper SEO, your blog wouldn’t be found in the search results, which results in zero traffic or visitors. To know more about SEO, you can refer to this article from Moz.
So you see? Free blog sites can be great but if you’re thinking to get serious in blogging, I really suggest that you invest into a paid hosting.
Step 3: Set up your blog using your own custom domain (If you choose self-hosting)
I consider choosing your own custom domain a crucial step too. Why’s that? If I could have written this article a few years before, this wouldn’t have to be a vital process, but when I’ve got to find out about SEO and know more on how it works, it changed everything. I know SEO may seem alien to most of you especially to those people who’s just starting with blogging or is just thinking into starting one so here’s an article from Moz that could help you know more about it.
If you’re still confused about what a self-hosted blog is, let me explain it to you and how to set it up for your own.
In order to have a self-hosted blog, you need to come up with a domain name and choose what hosting company you want your blog to host with.
Domain: Is basically the URL or link of your website. Example: Facebook.com (Facebook.com is the domain)
Hosting: Is a type of Internet hosting service that allows individuals and organizations to make their website accessible over the Internet.
For this blog, I currently use Hostinger for both of my domain and hosting and so far so good.
Most hosting companies have a button that will automatically install WordPress on your blog. Easy as pie, isn’t it?
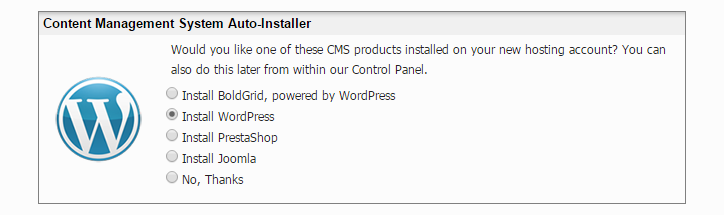
All you need to do is to register with any of your preferred hosting providers, choose your hosting plan and a domain name and just click on the Install WordPress button shown above.
Once everything is done, you can access your admin account by going to www.yourblog.com/wp-admin and you can start designing your blog or start adding a new post.
Step 4: Customizing your WordPress Blog
Now, this is the fun part.
Let’s make your blog look eye-candy by installing a new theme. You can do it by going to Appearance > Themes or by going to Appearance > Customize. You can install some free WordPress theme if you’re out of budget or shop for a premium theme.
For this blog, I used a premium theme and customized it a bit using a child theme. In order to do that, you need to have a little background on programming so that’s going to be quite complicated and I don’t want to overwhelm you. So to save yourself from paranoia, I’ll recommend that you purchase a premium theme that already has the customization that you like.
For your reading, I’ve prepared some blog posts about getting started with your blog and customizing it. Feel free to check them out.
- How To Install WordPress Theme For The First Time User
- The Beginner’s Guide to Tricking Out Your WordPress Blog
And that’s it! I’m quite confident that you can finally set up your own blog with ease. If by any change you’re still having some problems, please feel free to let me know by commenting below.
Enjoy your new blog!


Thanks so much for all the amazing tips, love them!
It feels so great to help. Thanks 🙂
Great tips!
Thank you 🙂
I can see you put some thought into this, Vanessa. I loved reading your suggestions and tips.
Thanks Sophia 🙂
this is awesome, I wish this was available when I started heh but I love when bloggers share their knowledge, make a site is such a pain
I can’t help but share it to everyone, coz it’s quite daunting for the first timers and it’s great to help 🙂